Devlog 7 - Stylized Environment!
Hello, it's Tyler again, our team's main environment artist!
My focus since the last post has been on solidifying our game's art style. We decided to move towards a stylized look that feels more hand painted and saturated from what we had before. This was a challenge for me as it is not a style that I've spent as much time working with, so I had to learn new ways to get the look I wanted.
Originally, I had made all of my assets in Maya. I think the software has some really nice tools for modeling, and I prefer the workflow for UV unwrapping. However, I ended up making the switch to Blender after this point. Not only do I have a wider variety of knowledge with the software, but I find that Blender offers a more flexible, nondestructive workflow that greatly helped in creating the style that I had envisioned.
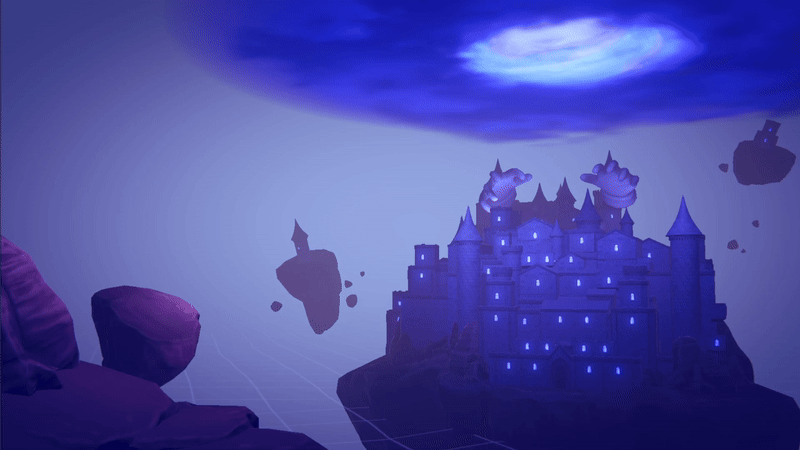
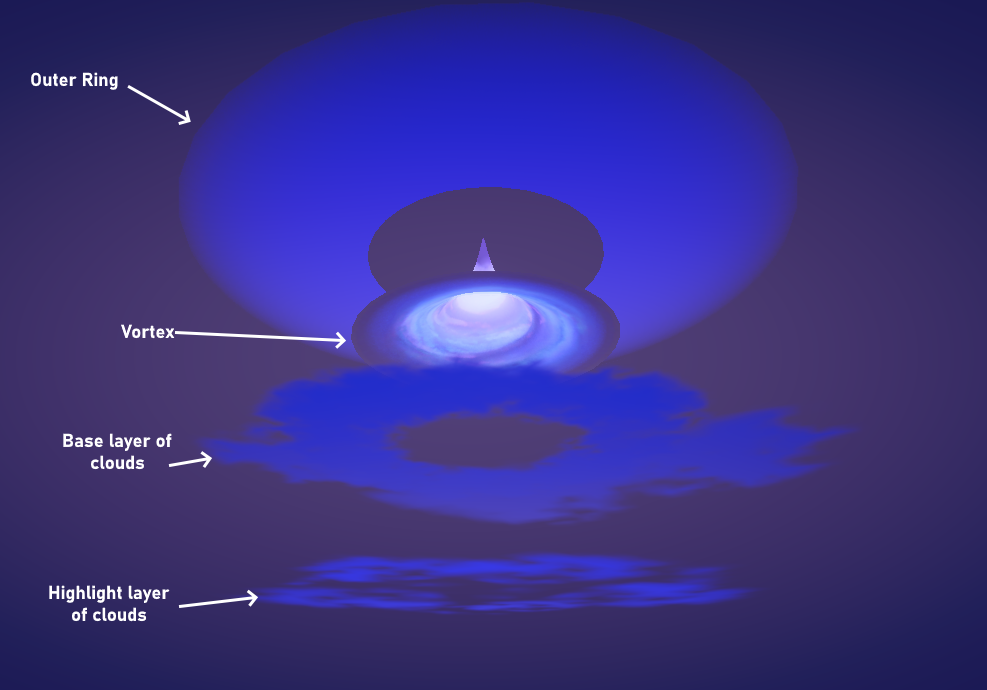
As part of our original concept, we wanted to have a large vortex cloud over top our castle. As the world the game takes place in is being deleted, this is the source that devours the world around you. When thinking about the tone of our game, I wanted the storm cloud to appear dark and threatening, as it looms over top our castle centerpiece. It was important to me that it had this foggy and mysterious look to it.
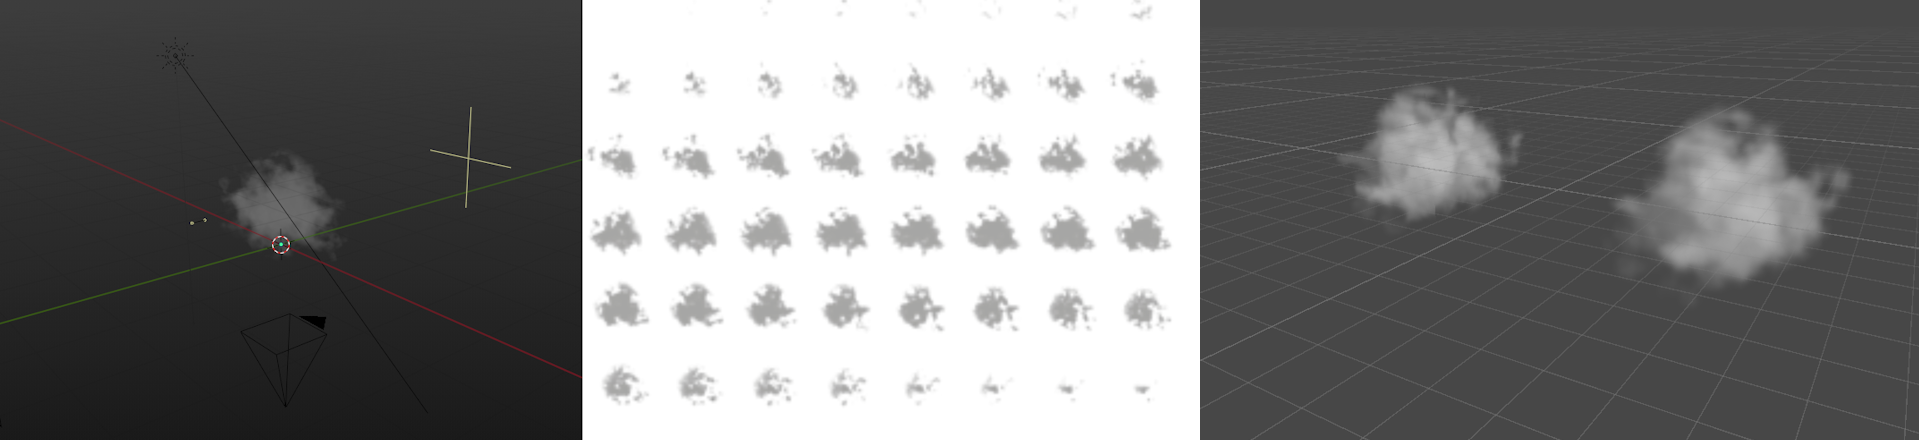
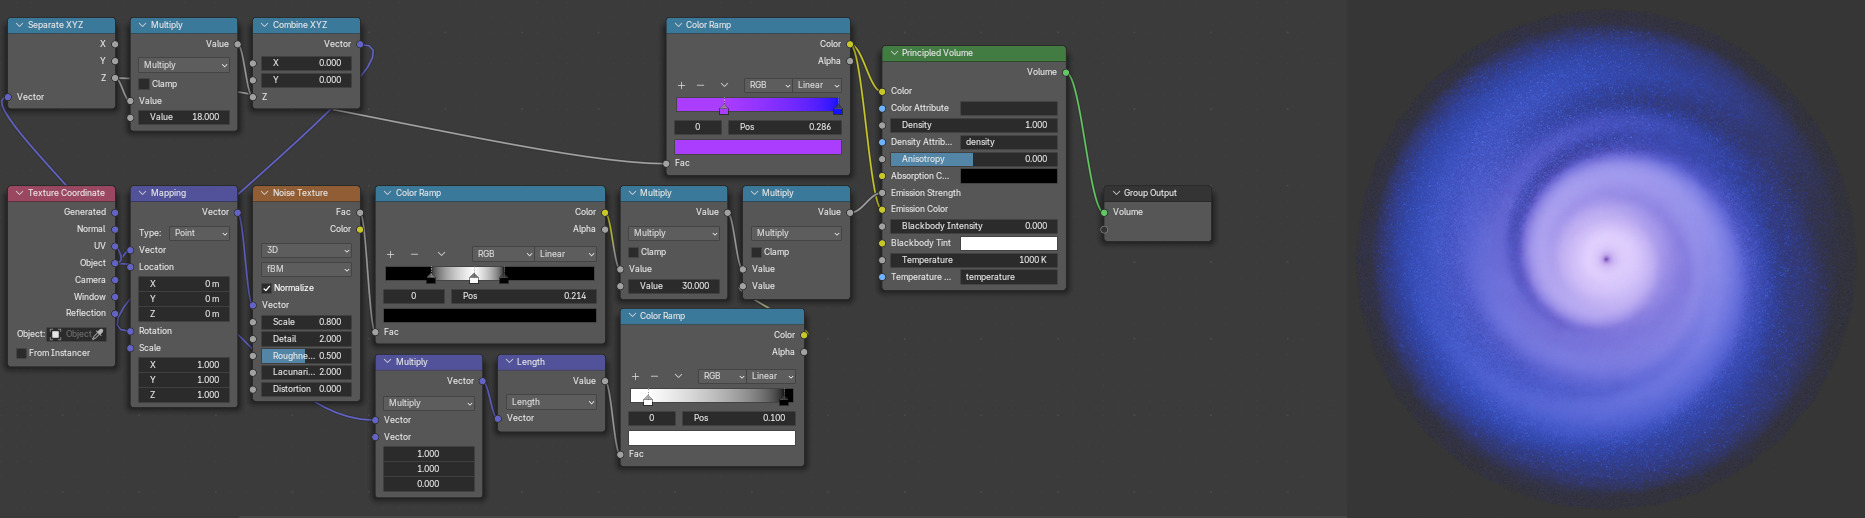
Creating the storm cloud took an iterative process. One of the advantages to using Blender is that the software allows you to easily create volumetric forms, which is exactly what I needed to create the effect I had in mind. The real challenge was getting these effects to work just as well in Unity. The most commonly suggested solution I found was by creating a Raymarching shader, which can be used to project a series of images as a 3D texture. I had found this technique from the official Unity shader book. I started with making a simple cloud along with the tutorial, and after making some adjustments, the effect turned out great.
Starting in blender, I modeled the basic shape of the cloud using metaballs. I would then apply the Mesh to Volume modifier, and the Volume Displacement modifier to transform my mesh into a cloudlike shape. By rendering out slices of the cloud horizontally in steps, we get individual cross sections of the cloud that can then be converted into a sprite sheet. After setting up the Raymarching shader using Unity's shader graph, we can input the texture as a 3D image to get the desired result.
While my first attempt turned out looking great, there were some issues that I ran into that made me consider if this was the right direction to be putting my time into. When testing with the final shape I wanted for the vortex, I ended up having issues where the effect didn't work as well from the sides. Since the storm cloud is intended to be viewed from multiple angles, both in game and from the main menu, I ended up having to find a new solution.
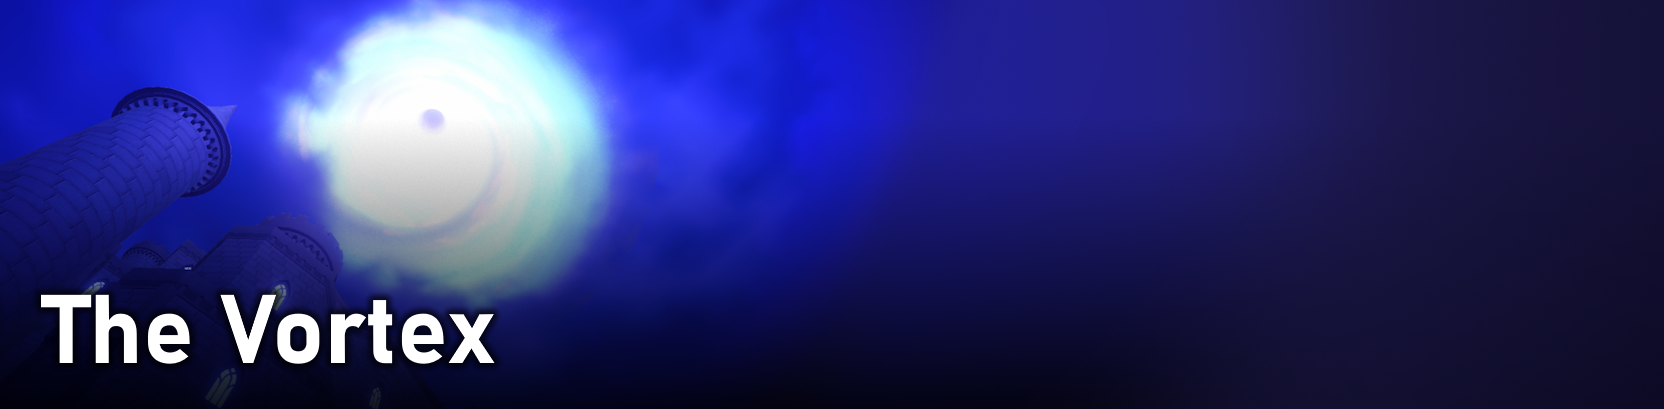
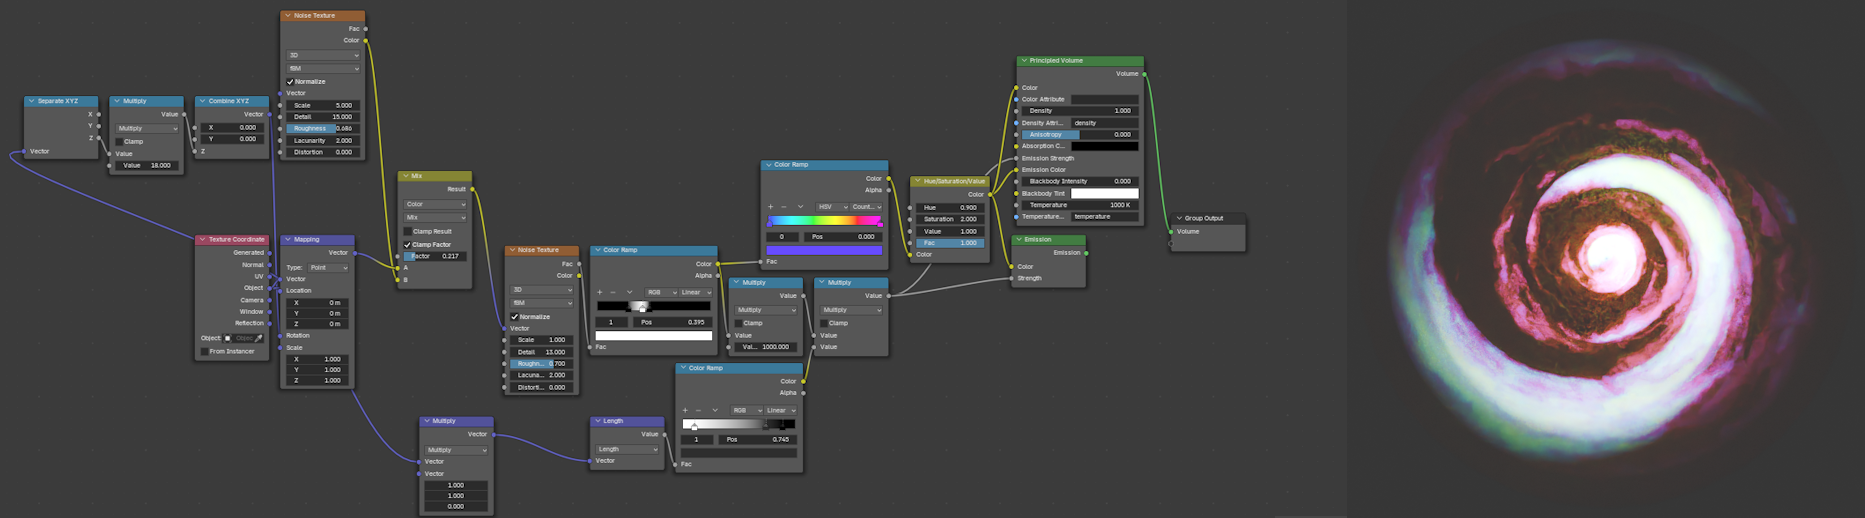
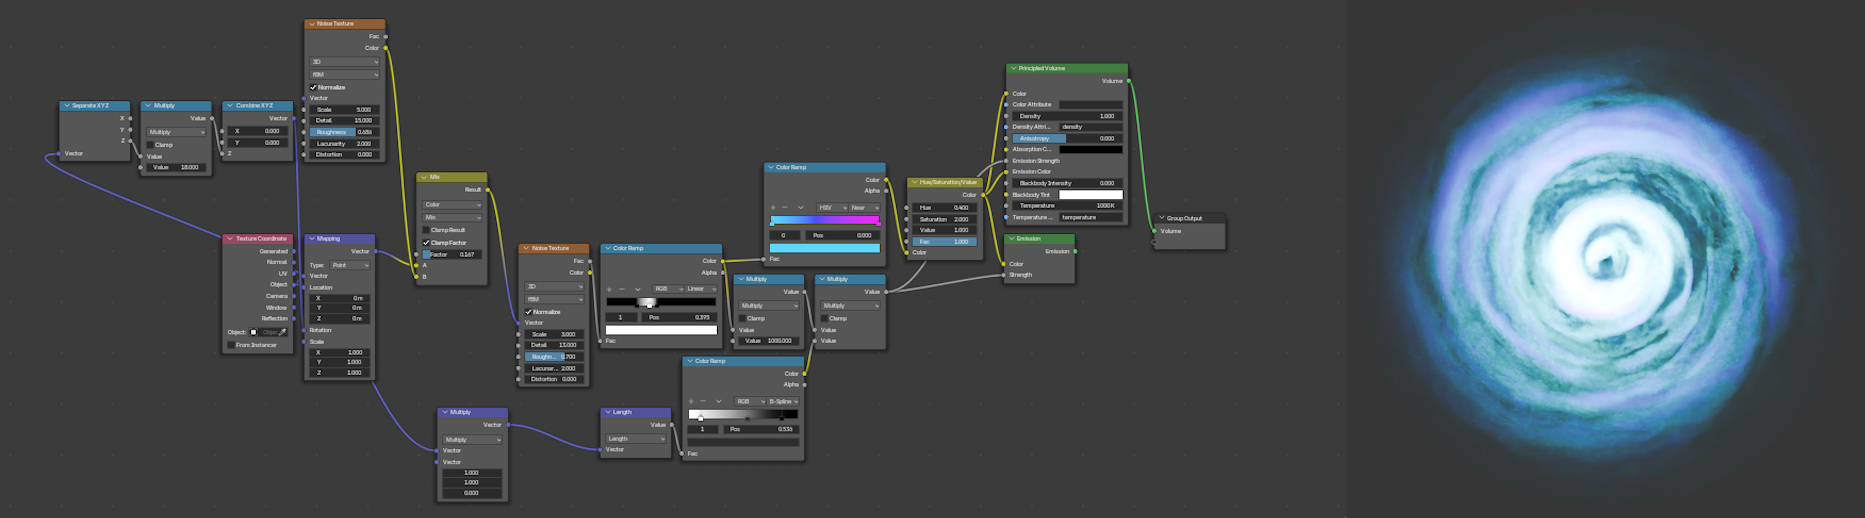
With my second attempt, I wanted to create an effect that looked just as good while being simpler and more versatile to implement. While endlessly searching for resources, I found a tutorial by "MTR Animation" for creating Wormholes in Blender, this would be the basis of my effect. By modifying the result from this tutorial, I was able to create the final result shown above.
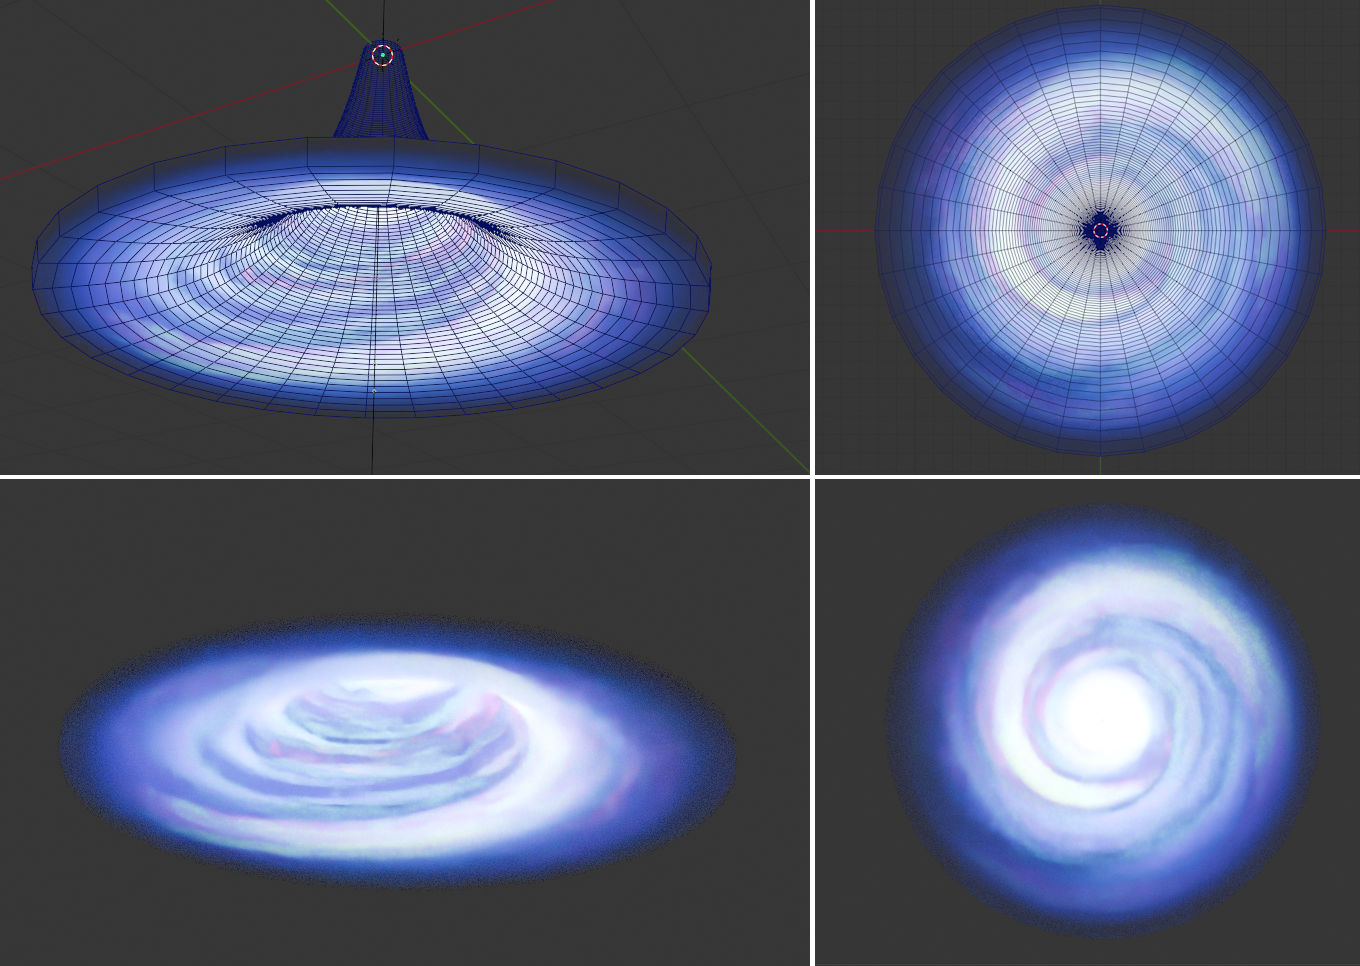
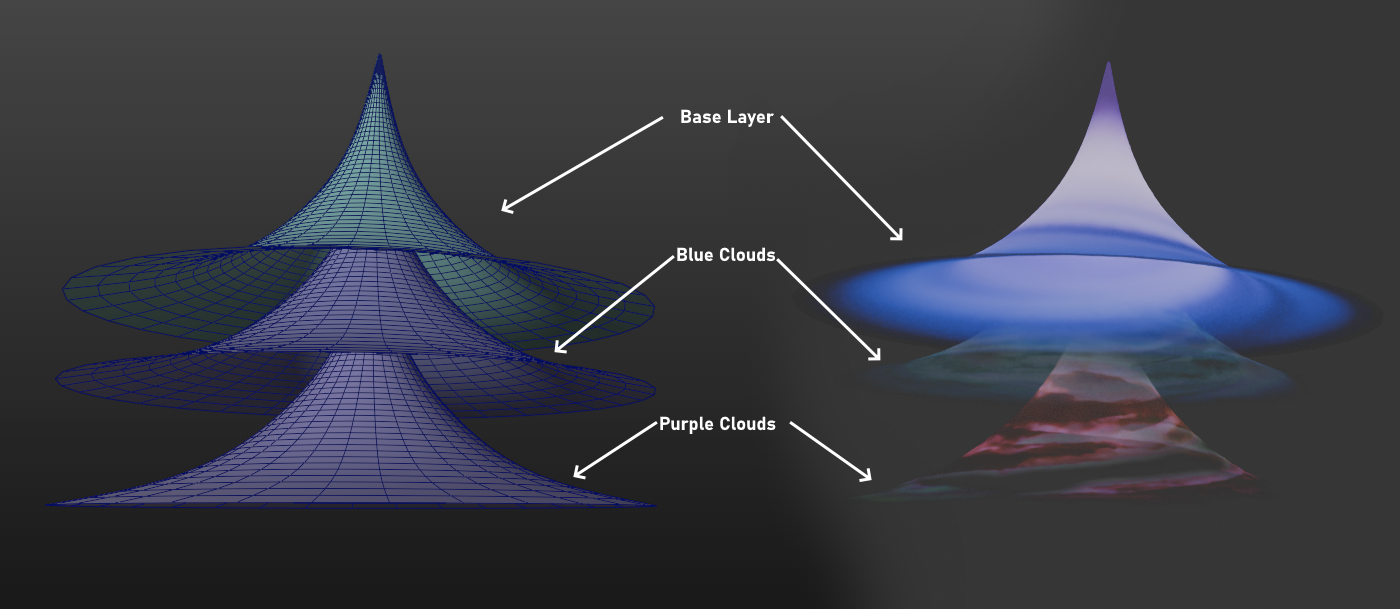
The textures I created are made entirely using Blender's node based material system, giving me complete control over the end result. As part of my process of transferring the textures from Blender to Unity, I decided to split up the vortex into three main parts. These parts included a base layer, a transparent purple cloud layer, and a transparent blue cloud layer. After creating each part, I would render out the image with a transparent background, and use it as a texture on a lower poly model inside unity. Having my model split into four parts allows me to animate the rotation of my vortex at different speeds.
To finalize the vortex in engine, I reused one of the frames from my earlier attempt as a cloud texture. By applying the texture to a plane with varying colors, I copied clouds around the surface of the vortex to help blend the sharp edge of the model with the sky.
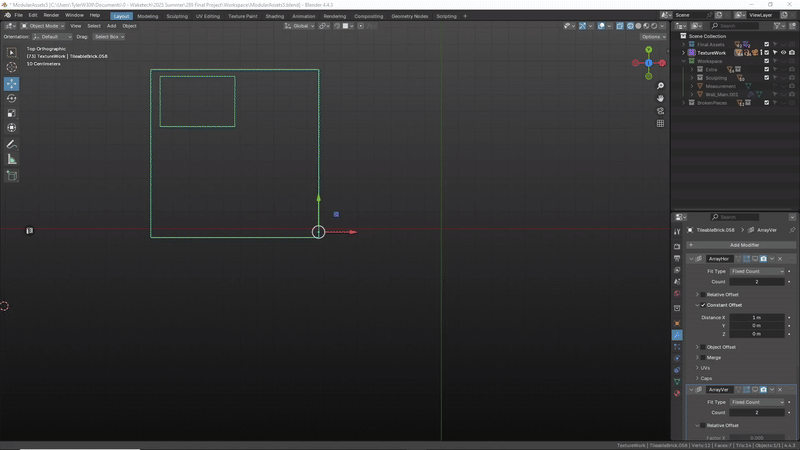
When making the choice to move our art style over to one that felt more hand crafted and unique, one of the most useful techniques I learned was creating seamless stylized textures. Blender became incredibly useful for creating these textures, as it allowed me to make my textures from sculpted details with a high poly to low poly workflow, while being able to see the pattern repeat in real time. Having the insight to see what the final texture will look like when tiled saved me a lot of time by showing areas where the pattern repeats or feels out of place as I'm working on it.
To use this method, I start with a one meter plane with two constant offset arrays. By adding any meshes I make to this plane, the results are copied over to each of the four quadrants.
When creating the brick texture shown below, I started by sculpting a variety of individual bricks of different sizes and detail. After I have all of my bricks made, I can then add them to the tiling plane as I go, tiling my mesh to each copy of the plane. After I have a working layout made, I can separate individual bricks by loose parts, and make changes using the Scale Cage tool to remove any gaps or repetition I might notice in my pattern.
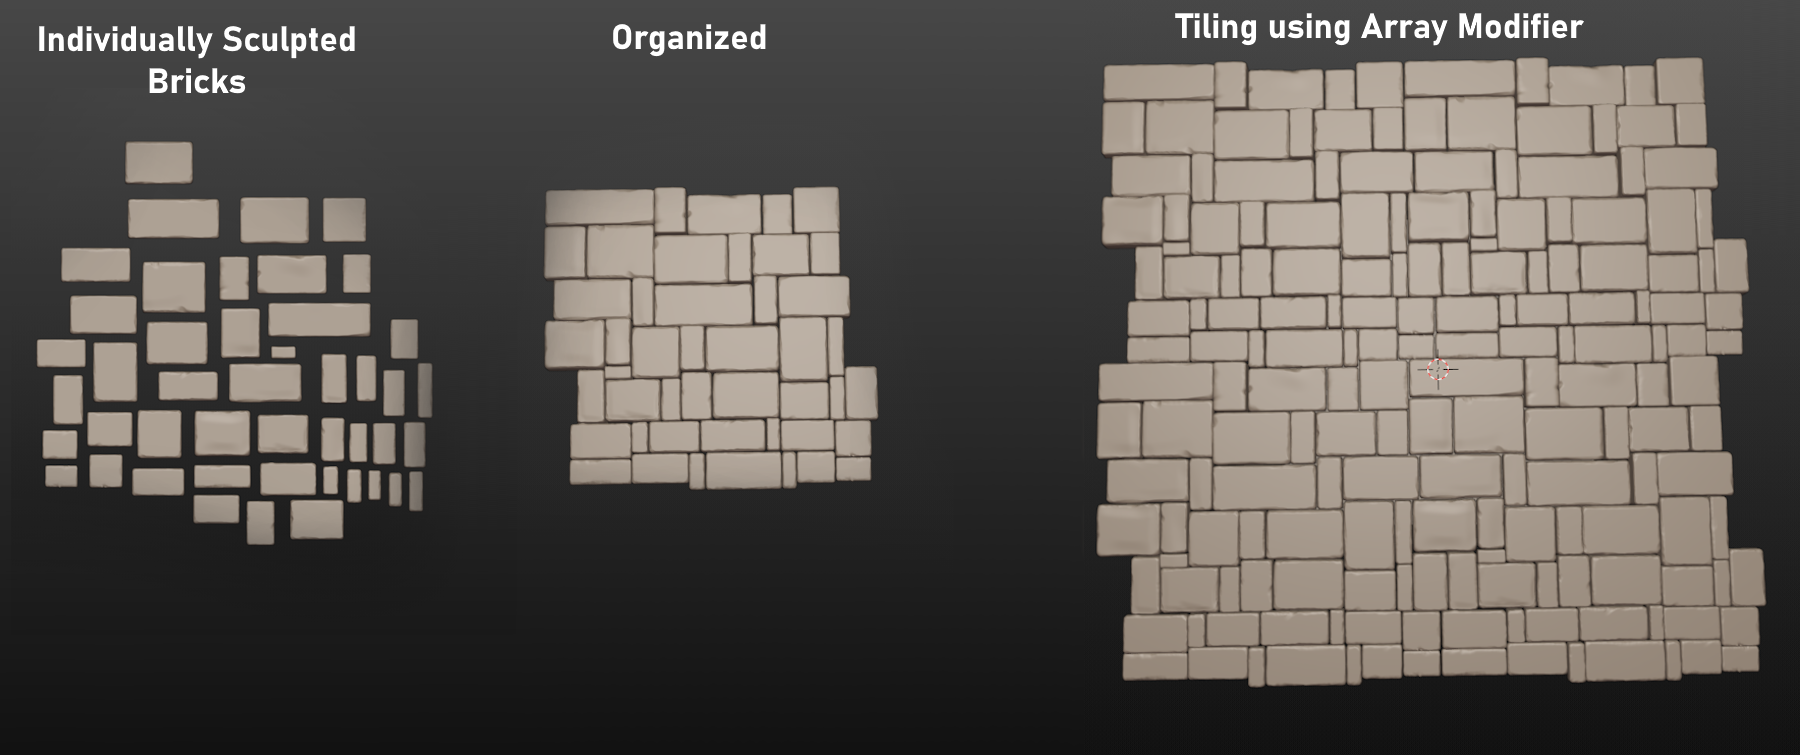
After I'm satisfied with the result of my sculpt, I can take the high poly sculpt mesh and bake it inside Adobe Substance Painter. For my low poly model, I use another one meter plane centered in the middle of my sculpt. This way, each edge of the bake is guaranteed to to tile correctly.
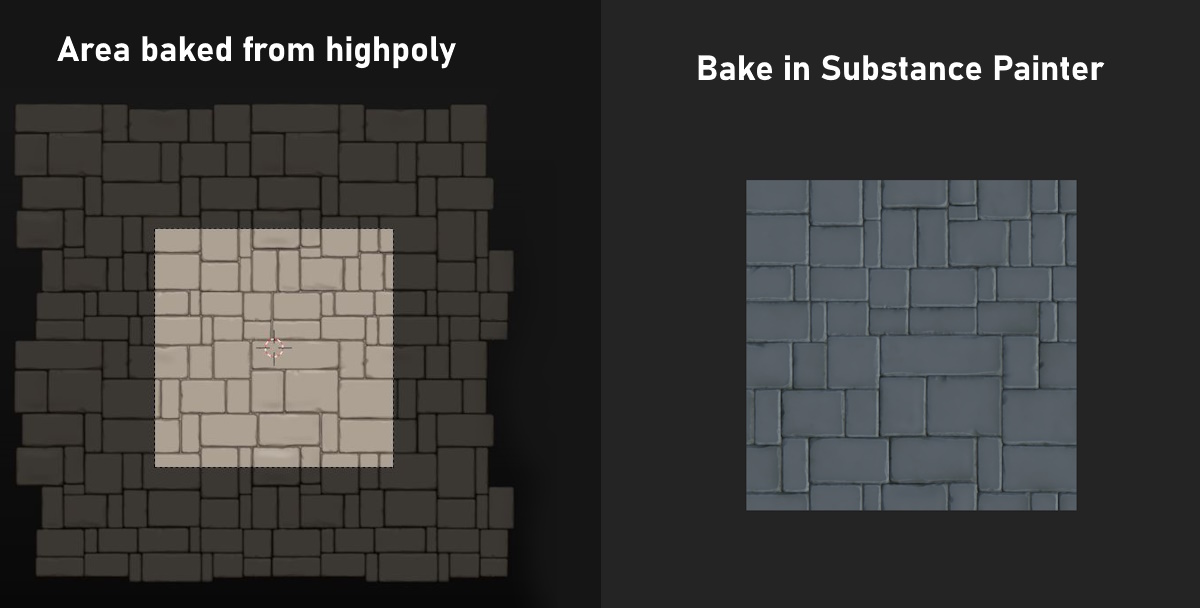
Since the high poly sculpt introduces majority of the details, the texturing process inside of Substance Painter is kept simple, only using a few generators and grunge textures for the final result.
Leave a comment
Log in with itch.io to leave a comment.